Managing My E-Mail Account
Bid documents
are automatically sent to your e-mail as a PDF file. Some clients
may receive a large number of bid documents each day which can
easily fill up your mailbox.
We can provide additional e-mail accounts specifically for receiving
bid documents. This will free up your current e-mail account
for regular business communication. There are no costs for these
additional e-mail accounts. These additional e-mail accounts
are set to receive bid documents. You can not send from these
accounts.
Your current browser's e-mail system will allow you to add multiple
e-mail accounts and provides an effective method of managing
large e-mail accounts.
Please contact
us at HelpDesk@Prime-Vendor.com
to request
additional e-mails. We will require your client number.
Additionally you can establish multiple clients to receive bid
documents. Bid document receipt may also be organized on a geographic
basis for outside sales teams.
The following are instructions on how to set up your Internet
Explorer account to accept additional e-mail clients.
If your ISP e-mail account is to small, we can provide an additional
e-mail address to avoid returned e-mails. The following instructions
are for Outlook Express on Internet Explorer. This allows you
to use multiple e-mail accounts. You will keep your current
ISP e-mail address, and use this additional address for your
bid documents. Outlook Express allows you to quickly change
from one e-mail account to another. We will use your user name
as originally registered with us. If you require technical support
call us at 1-800-746-9554.
Start Outlook
Express.
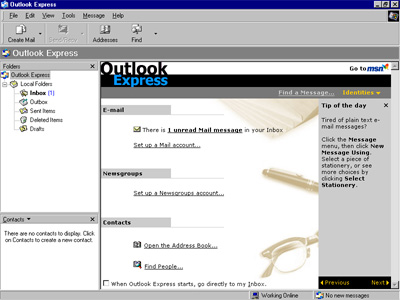
After Outlook
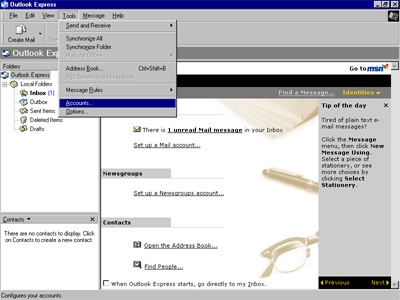
Express loads up, click on the Tools
selection on the menu bar. Then click on the word Accounts
on the menu box that drops down from the word Tools.
This will bring up the Internet Accounts dialog.
In the
Internet Accounts window, click on the Mail
tab
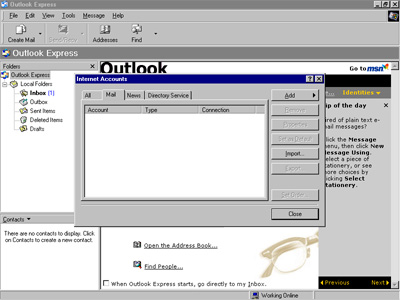
To add a
new email account, press the Add
button.
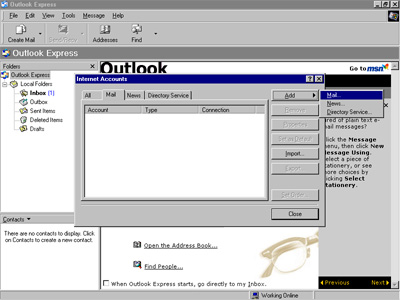
After pressing
the Add button, click on Mail
in the selection window that comes out at the right.
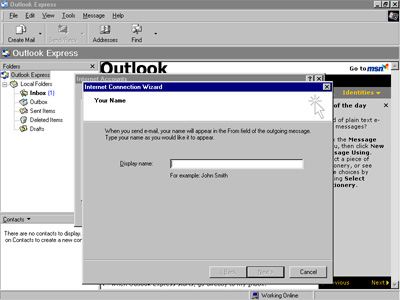
In the window
that comes up after clicking Mail, you will be asked
to enter your display name. You may enter any name that you
like here. Enter your chosen name then press Next.
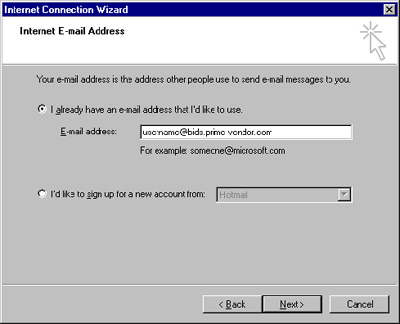
In this
window, click on the first radio button and enter your assigned
email address. Then press Next.
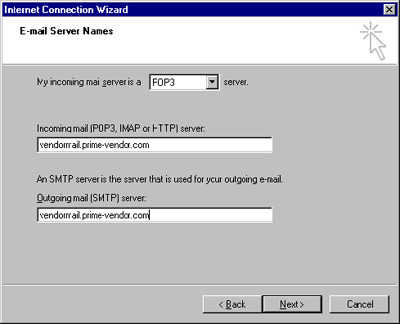
Have incoming
mail server set to POP3. Then enter vendormail.prime-vendor.com
in both fields in the E-mail Server fields, next press Next.
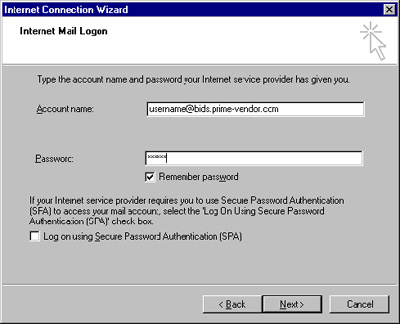
Enter your
assigned account name and assigned password then press Next.
Note
The account name will be 'assigned user name'@bids.prime-vendor.com
The assigned user name in this example is 'username' so the
account name will
be: username@bids.prime-vendor.com
Do not leave off the @bids.prime-vendor.com
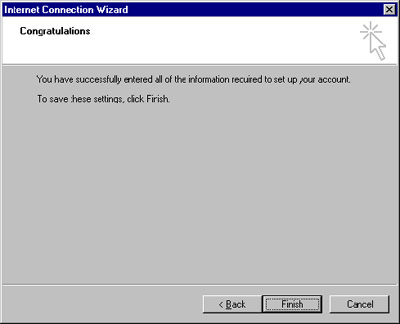
At the point
the email account is setup. Press finish
to return to the Internet Accounts window.
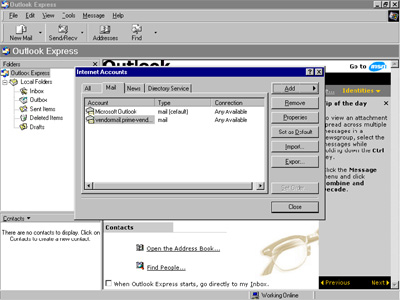
Once back
at the Internet Accounts page, your new account will be listed.
Press Close to return to
the email program.
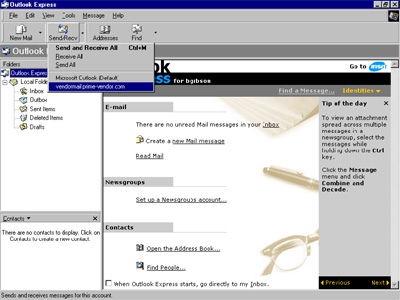
After the
account is setup, the user may check all of or just part of
the users email. To do so, press the Send/Receive
button on the toolbar and choose the account to check email
for.
previous
topic | instructions home